
Restart with Abaqus/Explicit
The launch of FlowVision with the Abaqus/Explicit solver has slight differences from the launch with Abaqus/Standard. There are similar steps for this launch:
- Preparation of projects;
- Preparing the Abaqus project for launch to continue;
- Synchronization of simulations - preparation of the FlowVision project for continuation;
- Launching a coupled simulation for continuation.
Preparation of projects
Abaqus project
It is necessary to consider the possibility of restarting this project, when Abaqus project is being created. If there are no restart entries, all current progress will be deleted during the restart and the project will be started from scratch. It can be done either via the interface or manually by adding appropriate lines to the input file.
Via the interface: go to the Step module. Select Output> Restart Requests ... from the menu bar. The Edit Restart Request window will appear:
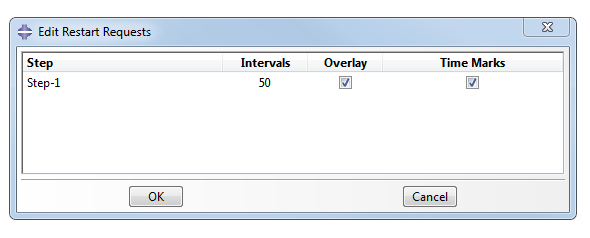
Abaqus/Explicit does not use a save frequency unlike Abaqus/Standard.
Similarly, this information can be added to the input file by introducing lines in the settings of the corresponding step:
- *Restart, write, overlay, number interval=50, time marks=YES
Parameters, that are set for restart:
- Intervals - the number of records that will be made during the calculation. The recording frequency can also be found out from the stop time in Abaqus, divided to the number of records.
- Overlay - overwriting the last save to restart. There will always be one point to restart. It is recommended for use when the results are saved frequently: the files for restart fill memory faster than the odb-files, and time for pre-processing process pre increases greatly.
- Time Marks - available only when the Intervals saving type is used. When Time Marks are turned on, Abaqus will record restart at the point where it is enabled. When Time Marks are turned off, the limit is relaxed and Abaqus can calculate a little more/a little less and make a record.
FlowVision project
To enable saving in FlowVision, in the PrePostProcessor, go to the Solver> Autosave data tab and turn on History> Yes in the properties window. The desired frequency of recording saves should be also enabled. Type: Automatic means saving at every step.

It is recommended to set save frequency in FlowVision higher than in Abaqus, because in FlowVision the history can be deleted, and in Abaqus - not. This frequency should be proportional to the save frequency in Abaqus.
A coupled simulation can be launched after preparation of both projects.
Preparing the Abaqus project for launch to continuation
In the Abaqus .inp file, you need to copy the last step into a new empty file and save it with the .inp extension.
The first line must be written as *Heading. Under this line, you need to write:
*Restart, read, step=N, interval=i. end step
All mentions of previous step should be changed. As example: If original analysis was named as STEP-1 than better to name new restart step as STEP-2 in input-file.
It is necessary to determine from which step and from which record to start Abaqus to continue. All this can be done using a file with the extension *.sta. The file looks as follows (Fig. 2). The step number is in under the line SOLUTION PROGRESS.
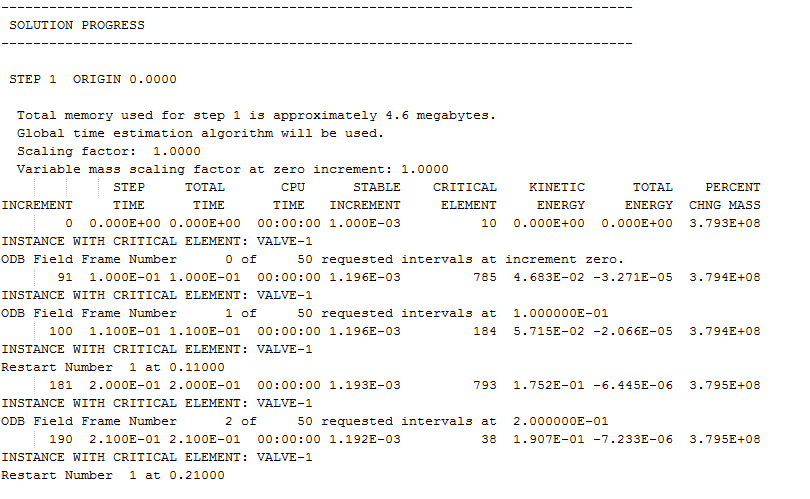
To find the number of the interval from which you want to start, you need to find the line Restart Number in the *sta file. If Overlay is used, the save will be overwritten and the Restart Number will be equal to 1. In the example below, the Restart Number is 4. This value is assigned to the interval parameter.
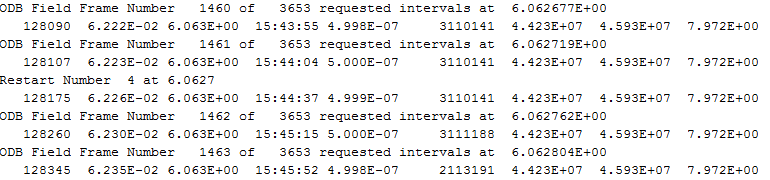
Recommendation: since it is rather difficult to summarize all iterations in the *.sta file that is generated by the Abaqus/Explicit solver, you should always use the TimeMarks = Yes parameter. The time, with which the FlowVision project will be synchronized, is written in one line with the Restart Number.
Project synchronization - preparation of the FlowVision project for continuation
If FlowVision made more records than Abaqus, you need to choose the time from which FlowVision will begin its calculation. In the previous paragraph, we described the procedure of summing all time intervals to find the exact time. Time in the fvproj-file have to be compared with this time.
If the Solver with project is connected to PPP the unnecessary saves should be removed by selecting File> Save with selection ... in the menu bar.
For deleting via the fvproj-file, the necessary <ITEM> block is found with the time that had been found earlier from the Abaqus sta-file.
For example:
<ITEM>
<Number>302</Number>
<Iteration>604</Iteration>
<Time>0.035500000000014</Time>
<Contents>OSMV</Contents>
</ITEM>
Launching a coupled simulation for continuation
A new configuration file should be created for CSE Director. Just create a copy of the source file. In this copy all references to the name of the original Abaqus project should be replaced by the new name. It can be done by a simple search and replace with a text editor.

The CSE Director line the name of the configuration file should be changed.
All the following steps are similar to starting both Abaqus Co-Simulation Engine protocol and Abaqus Direct Coupling protocol.
After completing all the modifications, Abaqus starts to continuation using the oldjob parameter. The source file is specified as oldjob, and the new file is specified as job.
FlowVision can be launched from the FlowVision Terminal, from the PrePostProcessor, and from the command line. You must set the following parameters
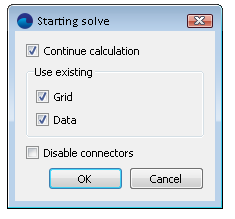
In case of starting via the command line, it is necessary to change SS_SOLVESTART<0>, where instead of 0 specify the value 7 (SS_SOLVESTART<7>).
Useful references: